Jan 29, 2010

Photography Friday - The Rule of Thirds


Here we are at the end of the week. I'm so excited to start Photography Friday! I have chosen to blog about photography because I want to take better pictures of my kids. I have had no training in photography but I have been researching and practicing. I am going to share about what I am learning.

Apparently there is a basic composition rule of photography that everyone knows. Everyone except us moms! It is called "The Rule of Thirds". It is all about how to line up your shot.

As you line up your shot you need to imagine this grid. Some camera's have a function where it will put it on your screen.


This grid has:

2 horizontal lines. Top line = "eye line" Bottom line = "horizon line"
2 vertical lines.
4 points where these lines intersect each other called "power points"

THE RULE OF THIRDS:

PLACE THE MOST IMPORTANT PARTS OF YOUR PICTURE ON A LINE , A POWER POINT OR BOTH.


Example #1:

Lets talk landscape first. It's a little easier to explain. The picture below has 2 important parts. The trees and the bale of hay. Line them up on 2 POWER POINTS. Placing the points of interest on opposite lines makes the picture the most interesting. Easy huh?


Example #2

Still talking landscape here. The 2 important parts are the tree and horizon. Place the horizon on the HORIZON LINE and the tree on a POWER POINT. Also pretty simple.


Example #3

Now lets consider taking pictures of our kids. Your child's beautiful eyes will always be the most important part of your picture. Line them up on a POWER POINT on the EYE LINE. If your child is doing something try to line up their activity on another POWER POINT. The child's body should be lined up on one of the VERTICAL LINES.


Example #4

When photographing babies who are laying down line up their body on the HORIZON LINE. Place their eyes on a POWER POINT on the EYE LINE.


2 QUICK TIPS

1. You do not have to be exact to take advantage of this rule. If your child's eyes are close to the POWER POINT on the EYE LINE that is all you need.

2. If it is hard to do this as you take pictures, do it when you crop the picture instead. I use "iphoto" on my Mac and it has the grid up for me as I crop my pictures.

Here are a few pictures that I have taken practicing The Rule of Thirds:


Jan 28, 2010

Things for Kiddos Thursday - Winter Sun Catcher


I found this cool winter craft in Disney's Everyday Fun magazine. I loved the idea of coloring and freezing ice with Sweet Angel. She thought it was great! We ran to the freezer every 30 minutes to see how the ice was doing. She was able to see how it froze on top first and was still liquid underneath. We talked about how lakes do that in the winter time and the little fish swim under the ice.

Here is what you need:


water
food coloring
ice cube tray
round cake pan
small plastic cup
ribbon

1. Create colorful ice cubes by adding one to three drops of food coloring.


2. Fill the round cake pan two-thirds full of water. Set a plastic cup full of water in the pan to make the whole for the ribbon. Place in the freezer for 1 hour.

3. Put the colorful ice cubes in the pan. Let the whole thing freeze solid.


4. Remove the plastic cup. Flip the sun catcher out of the pan and hang it outside with the ribbon.

Check back tomorrow for Photography Friday!

Jan 27, 2010

Welcome Home Wednesday - What?! You plan your meals a month at a time!


Yes that's right. I like to plan my meals a month at a time. I can't take credit for this idea. My amazing friend, who lives WAY too far away, is the one who got me started on it. I had no idea that planning meals that far in advance was efficient or even possible.

I think most of us hate planning meals. It is a time consuming task that just stresses us out. We can probably all agree that planning a week at a time is doable. Well if you go back and look at your plans you would probably notice that what you eat each week doesn't change all that much. Keeping that in mind lets get ready to plan.

GET READY...

First decide on a format. I use an Excel spreadsheet because it is easy for me. You can write it on paper if that what works best for you. I do recommend having it on a sheet of paper that you can hang on the fridge.

I have a column for the "day" "date" "lunch" and "dinner". You can decide if planning lunches is important to you or not. I like it because I'm home all day long. It also gives me a spot to plan for weekend lunch's which are usually more important.


At the bottom I have a spot to record leftovers and dinner that we skipped for some reason. Write down your leftovers and either what day they were made or what day you should throw them out. At night before you start the dishwasher glance at your list and see if you need to toss out a leftover that is past it's date. This prevents me from finding mystery food in my fridge.


Record any changes you make to your meal plan. Cross out what you skipped and write in what you had instead. It will help you see what you family really likes and if your plan was good or not. It helps our family realize when we are eating out too often! Write your skipped meal down at the bottom so you can use it later, maybe even next month.


GET SET...

1. Identify any days of the week that you may be really busy and not have much time to cook. You will want to plan something simple. A crock pot meal, Spaghetti or leftovers works great for those days.

2. Give your favorite meal a special day of the week. (You know the meal that your family eats once a week even if you don't plan on it) We like Tacos on Wednesdays and Pancakes on Sundays.

3. Next pick a day of the week that is convenient for you to try new recipes. If you do this you will get to try 4 new meals a month. Not bad.

4. Sit down with your recipe box/cook books. Make a list of all the meals that your family likes. Put them in 2 categories, "Fast" and "Needs some time but SO worth it" :o) Don't forget to put down those really quick meals that don't have recipes. Like fried egg sandwiches and grilled cheese. You are going to plan from this list so don't forget anything you like. As you find new recipes that your family enjoys add them to this list.


5. Gather together your recipes that you have been meaning to try. (if you have any)

GO!...

These are the steps that you will do each month. Get Ready and Get Set are done for good!

STEP 1: Write in any SPECIAL PLANS you may have. There will be plenty of days that you will not have to cook at home. Also note the days that you will need to make something special for company. (i.e. birthday party, brunch out with family, pizza for the big game etc...)

STEP 2: Write in your FAVORITE MEALS on their special days.

STEP 3: Make note of your BUSY DAYS and fill in a quick and easy meal. Another idea is to plan a meal that usually has left overs (like lasagna) two days before your busy day and plan to have the leftovers.

STEP 4: Pick out 4 NEW RECIPES you want to try and put them on their designated "new recipe day."

Hey look, You don't have that many days left!

The Picture below is my January meal plan. I highlighted the leftovers, new recipes, Taco Tuesday, Pancake Sunday and Dinners out. I did this just to show you that by step #5 all I had to do was fill in the white spaces.


STEP 5: Using your MEAL LIST start from the top begin filling in your meals. You already have them written down and categorized. Remember to plan for the leftovers. (example: Tue-Macaroni Chili. Thu-Leftover Macaroni Chili.) Don't hesitate to repeat meals. It is WAY normal to have the same meal 3 or more times in the same month.

STEP 6: RELAX and don't do this again for an entire month!

I hope you try this at least once. It is really an amazing feeling to have your meals all planned and not have to worry about it for the whole month. Planning a week at a time makes me feel like I am planning constantly. Monthly planning also helps you view the big picture and gets those new recipes out of your recipe box and onto the table.

Remember to be flexible. I always make changes to my plan. If you don't feel like eating what is planned switch it with something else. It's not the order that matters it's that you have a month worth of meals planned and in the house.

Good Luck and Happy Planning!

Jan 26, 2010

Tasty Tuesday - Macaroni Chili


Today's recipe is my amazing Macaroni Chili but before we get to that I want to tell you a little about me and Tasty Tuesday.

I love to cook. I love to eat. I especially love to find great new recipes, cook them (successfully) and eat them! It is really the best. The only thing better than that is when people ask me for the recipe! If I had to pick one of the worst things ever, I would say it is slaving in the kitchen for hours over a new recipe and finding out that it tastes bad! It really puts me in a cranky mood that only Caribou (coffee) can remedy...and sometimes that doesn't even help!

I follow a few food blogs and do a lot of looking around on-line to find great new recipes. Don't worry I'm not a chef or anything. If you are looking for someone who makes up their own recipes you better look elsewhere for that. I'm just a mom who can follow a recipe and enjoys making great food for her family and friends.

Tasty Tuesday is all about sharing recipes that me and my family love. I will post a variety of recipes for many occasions. Healthy weeknight meals, fantabulous dishes for when company comes, baked goods, and wonderful things made with lots of butter! Oh and I almost forgot. When family birthday's come around I like to make fancy cakes with fondant and everything!


Now that you know a little more about me and all about Tasty Tuesday lets get back to...

Macaroni Chili is one of those recipes that I make over and over again. My family enjoys it so much at we eat it almost once a week. I have adapted this recipe from "Healthy Home style Cooking" by Evelyn Tribole. It is easy, healthy and fairly quick.


Macaroni Chili

Prep/Cook time: 35 minutes (20 of which it is left alone simmering)

1/2 pound ground turkey
Dash of onion powder (fine use a real onion if you must!)
1 clove garlic, minced
1 - 15oz can light red kidney beans, drained and rinsed
1 - 15oz can tomato sauce
1 - 15oz can stewed tomatoes (with juices), chopped
3 cups rotini (dry)
1 cup water
1 Tbl chili powder
2 tsp cumin
shredded taco cheese for topping
sour cream for topping

1. Brown the turkey sprinkled with onion powder. ( A real onion would go in next with the garlic). Drain the grease and add the garlic. Saute for 1 minute stirring constantly so it doesn't burn.


2. Remove the skillet from the heat. Drain and rinse the beans. Put them in the skillet. Drain the stewed tomatoes directly into the skillet. Chop the tomatoes up into small pieces and toss them in too.


3. Stir in the remaining ingredients. Tomato sauce, rotini, water, chili powder and cumin.


4. Bring to a boil then reduce heat. Cover and simmer for 10 minutes.

5. Stir well. Add some more water if it seems to be cooking to the bottom of the skillet. Cover and simmer for 10 minutes more.

6. Top each individual bowl with cheese and sour cream.


Like any chili this is great served with corn bread. But this isn't just any chili. I have abandoned any and all other chili recipes that I used to make. I don't even look for new ones on-line anymore. This one beats all! I hope you enjoy.

Jan 25, 2010

Memory Verse Monday - 1 Timothy 6:18 on Sharing


Teaching your children to hide God's word in their heart is one of the most important things you can do. Each week I memorize one verse with my 3 1/2 year old daughter "Sweet Angel." I want to place high importance on God's Word and teach her that the Bible is our best source for how to live our lives.

I have a great book called Parenting with Scripture by Kara Durbin. It is organized by topics and gives serveral verses to go with each. There is also a discussion section for each topic to help parents talk about applying the verse to daily life. Finding verses in the book is easy but you can also Google anything...including topical Bible verses :o)


Children are never too young to read scripture to. You should quote and read God's Word to your kids no matter what their age. I started memorizing verses with my daughter when she was 2. I wish that I would have started earlier! A toddler forming sentances can remember "God is Love" 1 John 4:8. And what an important truth for them to hide in their heart!


To help Sweet Angel memorize her Bible verse we say it together several times each day. As the week goes by she can say more and more of it by herself. Having specific times each day to say our verse helps both of us remember. We say our verse everytime we eat or go to bed. And for a 3 year old that means that we say it 7 times a day!

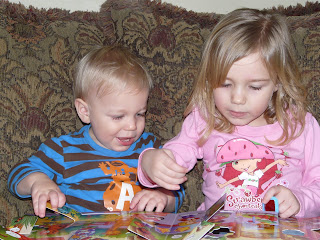
This week's verse is focused on SHARING. My Sweet Angel is learning to share with her 16 month old baby brother "Little Buddy."


"Do good, be rich in good deeds, be generous and willing to share."

- 1 Timothy 6:18


By the end of the week when I spot Sweet Angel being selfish I can just ask, "Honey, What is 1 Timothy 6:18?" And do you know what? She knows the answer!


Happy Memorizing! Come back tomorrow for Tasty Tuesday!

Jan 24, 2010

About Me and My New Blog


Hi! My name is Jeni. I'm a young happily married Christian mother.

I am married to my high school sweet heart. We have been together for nearly 11 years and married for 7. My husband, "Super Man", is the best gift God has ever given me hands down!! I am so very much in love with him and loved by him. I am so blessed by the love, devotion and selflessness he shows our family each and every day. He is truly my hero.


I am a former music teacher who is now LOVING being a stay at home mom. "Sweet Angel" is our 3 1/2 year old daughter and "Little Buddy" is our 16 month old son. They are both the most beautiful, smart, sweet, amazing children in the entire world! In my opinion :o)


This blog is all about being a mom and making a home for your family. I have decided to organize my blog by giving each day of the week a topic. Here's the plan...

Memory Verse Monday
- A weekly Bible verse to memorize with your kids.

Tasty Tuesday
- Favorite recipies and fabulous new finds.

Welcome Home Wednesday
- All things homaking.

Things for Kiddos Thursday
- Crafts, games, books and more.

Photography Friday
- A mom learns to take better pictures of her kids.

I Hope you enjoy reading!